Related Posts with Thumbnails

Decadent Chocolate Cake with creamy Peanut Butter Frosting and a drizzle of chocolate!

Hello everyone =)

This weekend I had a killer craving for sugar, and I hadn't baked anything for a while, so you just KNOW trouble is brewing ;)


I havent baked a chocolate cake from scratch in over a year, so I thought now would be a good time to give it a shot! I was itching to try that whole "Black Magic" Chocolate cake over at Hershey's so I thought...why not? But I didnt know what to pair it up with. Chocolate frosting was too much for my taste buds at the moment, but as soon as I opened my cupboards, and saw that big jar of creamy kraft peanut butter, I was set!:)


But of course, for whatever reason, this time I didnt bother taking out all my ingredients out before hand and making sure I had enough of everything, and ofcourse that ONE time you dont check is the ONE time the Universe decides to scorn you. So after I was almost done I realized I had NO Milk!*sigh* a quick google search told me I could try yogurt as a substitute, which gladly we had 2 containers full.

Or so I thought.


Turns out both of them were almost empty, and put together they made about 2/3 cup of yogurt. So what do I do at this point? Fill it up to one cup with soy milk ofcourse! *smacks forehead* yah. I was expecting an epic fail, but thankfully I continued. I was so scared about how it would taste, but it turned out pretty yummy!


The only bad part was the cake became really "sticky" at the tops...like NOT WORKABLE sticky...so had to cut all the tops off.


The cake was also a tad bit hard to frost, because even though I did a crumb coat and everything, it still got crumbs, and at one point I pulled at the frosting too much and a part of the cake just chunked off!


Yah...it took some work! But in the end it turned out YUMMY. it was really heavy ( I prefer lighter cakes) but it was stillll realllllyyy good. With messed up cake and all! lol

So...heres the recipe:

Black Magic Cake

Ingredients:
  • 2 cups sugar
  • 1-3/4 cups all-purpose flour
  • 3/4 cup HERSHEY'S Cocoa
  • 2 teaspoons baking soda
  • 1 teaspoon baking powder
  • 1 teaspoon salt
  • 2 eggs
  • 1 cup buttermilk or sour milk*
  • 1 cup strong black coffee OR 2 teaspoons powdered instant coffee plus 1 cup boiling water
  • 1/2 cup vegetable oil
  • 1 teaspoon vanilla extract
Directions:
1. Heat oven to 350°F. Grease and flour two 9-inch round baking pans or one 13x9x2-inch baking pan.

2. Stir together sugar, flour, cocoa, baking soda, baking powder and salt in large bowl. Add eggs, buttermilk, coffee, oil and vanilla; beat on medium speed of mixer 2 minutes (batter will be thin). Pour batter evenly into prepared pans.

3. Bake 30 to 35 minutes for round pans, 35 to 40 minutes for rectangular pan or until wooden pick inserted in center comes out clean. Cool 10 minutes; remove from pans to wire racks. Cool completely. Frost as desired. Yields 10 to 12 servings.

* To sour milk: Use 1 tablespoon white vinegar plus milk to equal 1 cup.

Fluffy Peanut Butter Frosting

INGREDIENTS :

  • 1/2 cup butter, softened
  • 1 cup creamy peanut butter
  • 3 tablespoons milk, or as needed
  • 2 cups confectioners' sugar

DIRECTIONS

  1. Place the butter and peanut butter into a medium bowl, and beat with an electric mixer. Gradually mix in the sugar, and when it starts to get thick, incorporate milk one tablespoon at a time until all of the sugar is mixed in and the frosting is thick and spreadable. Beat for at least 3 minutes for it to get good and fluffy
** I also added about 1/2 tsp Meringue Powder....just to help it stiffen up and crust a tad more

After I was done, I felt it was obviously too plain, So I melted about 1/3 cup chocolate chips with 1 tbsp of margarine and 1 tbsp corn syrup (you could use honey) and went drizzling crazy!


Well thats all for now! Hope you enjoyed! Im going to be very busy this week with end of term school work and such, so prob no more updates until around friday? But then I will have a "special" post, its Nowruz Celebrations for us Persians, so I will make a special blog post all about it, (hopefully including some desserts I will be making on wed for it!)


hope everyone has a great week!


P.S. Sorry I went a little picture crazy this week....I took about 100 pics and just couldnt narrow it down any more! lol bare with me... and have a slice of cake ;)


Read more...

Salmon...mmm.....

Why hello, hello! Well I know I was supposed to update earlier with pics from my fabulous cake, and of the party and all, but alas there was some disastrous things that occurred, so I shall not. I will post up a post soon as a “house-cleaning” post of everything that I originally meant to blog about but probably wont get too :/ , but for now, I'm going to go in a TOTALLY different direction. I made this and took the pics a little while ago, but haven’t had a chance to post it up, so alas, it is time for its moment in the spotlight.


I present to thee....Salmon Fillets with Italian Garlic seasoning. I will admit I made that name up just now, since I've never 'named it' before but it is what it is. :)


I actually 'invented' this recipe one day in utmost haste. The thing with my family is that my mom is usually the one who 'feeds us' so to say... occasionally...rarely...my dad makes lunch. the one dish he knows how ;)


but EVERY saturday for some non agreeed upon (by me anyays) reason EVERY saturday I have to make lunch. My mom goes to work on Saturdays teaching language, and my Dad usually has errands to run. I sometimes make something 'random' like sub sandwhiches or a soup etc... but usually I make fish. My family lieks their fish. ESPECIALLY my parents, and ESPECIALLY Salmon! So one day I felt creative and made a topping for the fish (using cream cheese) that was an INSTANT hit (recipe to come!)


However, One day....Zahra comes down into the kitchen to make some salmon for lunch. But there is no cream cheese. OH GOD. I had no idea what to do, so I just threw some things together, and hoped for best. surprisingly it turned out pretty good, so we have kept this 'recipe'.

Now this comes down to taste, thats why I havent provided and measurements. But heres what you need for the topping:


1) Lemon Juice 2) Garlic Powder 3) Italian Salad Dressing 4) Salt & Pepper to taste

The Best part of this recipe is how simple it is to make, and how its PERFECT for when your in a hurry. In fact, if you let the salmon thaw in the fridge in the morning, after work you can probably prep this and bake it and have it ready to eat in under 30 min (depending on oven temp and type of fish ofcourse)


The Magical Ingredient!

So, first get ahold of some salmon fillets.... at least I think thats what they call it... and let thaw(in the fridge)!


Now for tha Magic! ;) feel free to follow along with the pics (click for large view)


place one of the salmon squares/fillets on to a medium size piece of alluminum foil. (It should be enough foil to cover/wrap the fillet when your done)

Pour some lemon juice (to taste) over the salmon (some of it gets absorbed)

Then sprinkle with a nice generous amount of garlic powder (or to taste)

Add Salt & Pepper to taste.

Then, shake up your Italian seasoning (doesnt have to be kraft or anything) and pour as much or as little as you like, but at least enough to cover the entire fillet.

And your done!
Then just wrap as so:


it should end up like the final picture. Then, continue for as many fillets you like. (If your in a hurry, or just plain lazy like me, you can put them all in one big foil, which works fine, but can somtimes be problematic!)

Pop it into the oven at 400F, it depends on your fish/oven, but mine is usually ready in 15-20 min.

Now you can enjoy just like that (I love drenching my fish in lemon juice!) Or you can spice it up some more with veggies. of course you can do whatever veggies youd like, but I find green beans and carrots and such go best with it.


In fact, I usually do a mix of 2 types of veggies.


mmmm.......

and there you have it! easy peasy if you ask me! Hope you people try it, and comment if you do!:)


Read more...

Earl Grey Cupcakes with Lemon Frosting

I've been SO so SOOO very busy with school this week....I've been dying. literally. I have had this week marked as the "week from hell" on my calendar. And obviously as a result I've had absolutly no time to even think about baking something up, but alas I ahve things to share today, because I have a 'stockpile' so to speak of baked yummies I made during my spring break!:)
**the following is personal story, if your interested read on, if not, scroll down to the pretty cupcakes!=D

But yes, I should probably be working on the 2 essays I have due tomorrow. But quite honestly, Im sick of essays at the moment. I had to hand in a Law Essay Monday night at 12pm, so I was at school till then.....then Yesterday(Tuesday) I had to hand in a Human Rights Essay (Why Racial Profiling is ineffective and deteimental ;) ) at 6:05. MY OH MY. My Prof is the MOST understanding prof in the world, def one of my fav, but he has a rule that if you dont hand it in by the start of class(6:05) its late. which is fair i guess. Only he CLOCKS it. If you hand it in at 6:06 ....ITS LATE ....and you loose 5% .....This should be fine if you dont procrastinate, but alas I do. So when I finished my spiffy essay at 5:30pm, I had to get a ride from mom across town to my school, a usually 25 - 30 min ride. Ofcourse Dad was out with the car at that point, and I had to wait outside till he got back so I could jump in.

My mom drove like a mad lady. And of course, whenever the universe KNOWS your late or in a hurry, it decides to send you plenty of red lights and traffic in places there has never been traffic before. Bitch. So, like a scene out of a James Bond movie, I jump out of the car while it's still moving and run into the building, going full speed, but damn me and my lazyness....Im so NOT used to running or going up stairs (elevators are my friend;)) That as soon as I ran up the first set of stairs, I was bent over backwards gasping for air. yah. thats me.

So finally after running and panting and grabbing my side cause of a cramp I got from runnning and panting, I managed to hand it in at get this: 6:04.

BOO-YAHHH! :)

P.S. My mom hates me. She says I cause her too much stress. LOL (she was more stressed over me handing it in on time then I was!)


But anywhoo.....back to the BAKING part! yay:) Ok so, I was looking through tastespotting a little while ago and I noticed an early grey cupcake recipe, I checked out the blog, but somehow I closed the window without noticing and lost the recipe. :/ SO....google is thy friend.

I ended up making these little babies.


with lemon frosting ofcourse.

They tasted pretty damn good! The lemon and the earl grey accent each other very well! But ofcourse, my mom had to wipe off all the frosting from her cupcakes before she could eat them. She said that she didnt like the frosting, (ofcourse-she hates frosting of any kind) but that she LOVED the cupcake, it has a nice floral tone....she actually thought I had put in rose water!


Anywho...without further adu, heres the recipe...with my alterations ofcourse!:)

Earl Grey Cupcake

  • 1/2 cup unsalted butter, softened (I use margarine...I know...Im horrible)
  • 1 cup sugar
  • 2 egg
  • 1 1/2 cups all-purpose flour
  • 2 1/4 tsp. baking powder
  • 3/4 tsp. salt
  • 1/2 cup milk
  • 2 tbsp. of loose Earl Grey tea leaves ( I suppose you could use a teabag, but if you want LOTSA aroma and flavour...do yourself a favour and use loose leaf tea)
Preheat the oven to 350.

Beat the butter and sugar together until it is light and fluffy.
Add eggs one at a time, making sure they are thoroughly combined before adding the next one.

Mix together the dry ingredients, including the tea. If your using loose tea leaves like me, then you may (or may not) want to grind them down a bit, you can do that with a mini blender, or just with your fingers, etc...

Beat in half of the dry mixture. Then add the milk. Then add the rest of the dry mixture, stirring until just combined. DONT OVER STIR. Line the cupcake pan with 12 cups(mine made about 16) and fill them about two-thirds full.

Bake 20 to 25 minutes. Cool thoroughly before frosting.


Thats all for now! toodles! :)

Read more...

Cinnamun buns....oh how thee haunt me!

Ah yes, sorry for the lack of posts. I've been uber busy with school. In fact...I should probably be working on my Law Essay instead of posting....but alas I am here!;)

Today, Im going to blog about Cinnamon Buns:


Is there anything better? :) Well a little while ago, my mom said she had a killer crave for cinnamon buns.I obliged. Instead of going to my "go-to" cinamon bun recipe, I tried one that was called "Clone of a Cinnabon"...I thought ,...you cant go wrong with that right? So I tried it.

Man.

It was brutal.

The recipe's dough was supposed to be made with a bread maker, So I startd adding the ingridints to the mixer. But soon I realized the recipe was WAY to big. I recuded the flour, and the bowl for the mixer was FULL. Needless to say, the mixing didnt work out in the breadmachine...:/

So I tossed it ino my kitchen aid mixer. That didnt work too well either.

So....I threw it in a bowl and kneaded by hand. Then I left it to poof a little...and it OVER poofed :P

aye-vay.


needless to say...it was a disaster.

So. I went back to my own recipe. It really is a wonderful recipe. I *love* it so very much! Its UBER simple to make and tastes DELICIOUSSS! Its a recipe that everyone....EVERYONE asks me for....but for some reason I could nevr quite bring myself to share it...its just *that*special ;)

I dont know why I *had* to try the other recipe.....even though this one is so yummy but I did...(and I plan on giving it ONE more shot....just dividing the recipe in half!)

So without further adu....here is the recipe!:)

Easy Peasy Cinnamon Buns

Makes about 15.... I usually double the recipe...or even quadruple it ;)

Dough:

2 cups of flour
2 TBSP granulated Sugar
1 Tbsp + 1 Tsp Baking Powder ** I know its a lot! But it makes the buns POOF incredibly!
1/2 tsp Salt
1/4 cup butter (or margarine)
3/4 cup milk

1. Preheat oven to 350F

2. In a large bowl mix together all the dry ingridients.

3. Cut in the butter and mix until crumbly
4. Make a well in the center of the mix, and pour the milk into the middle.
5. Stir to form a soft dough adding a bit more flour or milk as necessary. ( I usually use a pair of clean hands ;) )
6. Turn out on to a lightly floured surface, and kneed a few times.
7. Roll the dough into a rectangle. I have found that when the dough is rolled out horizontally it yields more cinnamon buns, and when rolled vertically, it yields bigger buns.


Topping:

1/3 cup butter
1 cup brown sugar
1 tbsp cinnamon

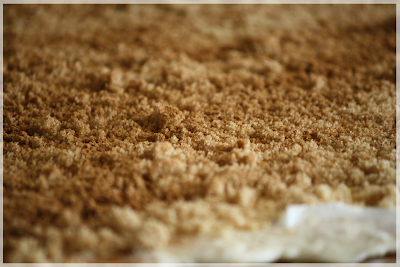
1. There are different ways to spread the topping in, but my favourtie way is to spread the butter all over the dough with a butter knife, like you would spread butter on toast. its the easiest and most convinient way to do it. Also, since the butter isnt melted...it wont ooze out when you roll it. Then just sprinkle on the brownsuagr and cinnamon...ofcourse adjust the amount to taste...I personally LOVE a LOT more cinamonn and sometimes even add some walnuts!


Then Roll up the dough like a jelly roll to make it into a long narrow log. Cut into 15 equal slices (or as much as youd like)

Place the buns into a greased baking ban. by baking pan I dont mean a sheet pan but a baking one...like this one (it doesnt have to be springform!)

Allow at least an inch all around for each cinnamon bun, because these things poof like crazy when baked.

Bake for about 15 min or until light brown.

Top it off with some glaze (mix 1/2cup icing sugar with 1 tbsp milk) or make cream cheese frosting or anything else you like to put on top!


Enjoy! Let me know in the comments if you do make it! I'd love to see pics!

Well thats it for now...Its 10:39 pm...and I should probably get to that pesky Law essay...:/ *sigh* only 5 more weeks of school left before exams!


Read more...

Random Fun Stuff

Song of the week: Glee Season 2!!

Watching: Criminal Minds season 6 (man! its mind blowing)

Inspirational Quote:

"Life isn't about finding yourself, it's about creating yourself"

Random Foodie Fact:

"The world's first chocolate candy was produced in 1828 by Dutch chocolate-maker Conrad J. Van Houten."

Privacy Policy (c) edible-moments 2010

  © Blogger template Shush by Ourblogtemplates.com 2009

Back to TOP